USB Controller with STM32

This project originally started nearly six years ago, when my friend and I patched together a prototype in my garage over the course of a week. It was constructed out of breadboard pushbuttons, birch plywood, an Arduino, and lots of glue. There were many issues with that version, including a patchwork driver, analog/digital interference, and unworkable wire management.
In 2020 we decided to revive the project, with the goal of fixing all the aforementioned issues, as well as providing a clean and ergonomic exterior. The goal was to have a generalized controller/gamepad for use with computer games. This time, we were able to succeed in that pursuit. Below I will elaborate on our design process.
Firmware⌗
One of the main goals was to have the controller be portable and simple to use. To that end, we decided to make a standard USB HID (Human Interface Device). This would allow it to be plugged into any computer and used without driver installations or custom programs, just like a standard USB keyboard or mouse. In fact, the controller enumerates as both a keyboard and a mouse on startup, and provides mouse input through the joystick, and keyboard input through the buttons. While this is a fairly simple paradigm, there were a few intricacies.
One of the main downsides to a naive implementation of the joystick-to-mouse mapping is that different uses require different schemes. In some cases, moving the pointer based on the direction of the joystick is the most natural. In others, having the pointer locked to the position of the joystick is best. The USB HID standard refers to these as “relative” and “absolute” positioning respectively. Unfortunately, this property is stored in the device descriptor, and is therefore static between enumerations. To circumvent this, our controller is always in absolute mode, but can emulate relative movement based on a toggle switch.
After writing the device descriptor, I implemented the USB functionality using the ST-provided middleware. Interfacing with the hardware was simple, and was just a matter of reading GPIOs and setting up the internal ADC channels for the joystick. Outside of one difficult-to-trace polling interval bug, the development process thankfully had few hiccups.
Electrical⌗
At the heart of the controller is an stm32f042k6t6 microcontroller on a Nucleo development board. It was chosen for its low price, USB support, small form-factor and sufficient GPIO. Few micros seemed to fit these criterion, but the Nucleo ended up working out nicely. One oversight was that not all GPIO are usable in the default configuration, as some are tied to other functions such as the FTDI communication with the host computer. However, by desoldering a few 0603 jumpers, this was resolved.
As with any physical switch interface, debouncing is required. Testing with an oscilloscope revealed that the maximum bounce time for these buttons was about 2ms. We decided that, given the amount of buttons, implementing this in software was the best choice. Power for the controller is provided by the USB 5v connection, which is stepped down by an onboard 3.3v regulator.
Contruction⌗
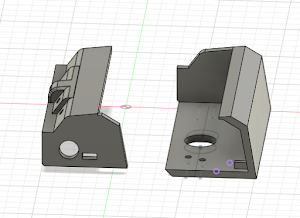
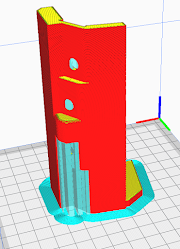
To avoid the mess of last time, we opted to 3d print all of the shell-pieces for the controller. My friend first carved controllers into Styrofoam blocks to model the ergonomics and button placement, and then measured the dimensions and modeled in CAD. It took a few revisions to work out the kinks, but the final shell is reasonably comfortable and sturdy. A few last-minute edits were made with a hacksaw.
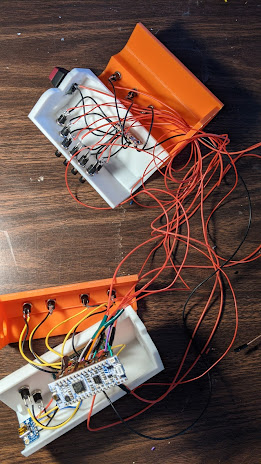
After cleaning out the supports and accumulating all the necessary parts, actual construction only took one day to complete. The joystick was soldered to a protoboard, which was epoxied to the shell with a slab of birch plywood. This protoboard was also used for interfacing grounding and power. All of the connections to the microcontroller had female breadboard headers attached, to allow for modifications in the future. After all the connections were soldered, and the wires were squeezed into the shell and taped up, we were happy to find that the joystick and most of the buttons functioned as expected. The remaining buttons were fixed the following week.
Conclusion⌗
While the controller isn’t quite as easy to use as we were hoping, it does function as a working USB controller. In addition, it is on a much stronger technological footing than the previous attempt. We will probably take a break from this project for a while, but in the future we hope to make more controllers with displays, dedicated PCBs, and sleeker ergonomics.